Centos7安装Apache2和Mysql
温馨提示:
本文最后更新于 2016年12月30日,已超过 2,951 天没有更新。若文章内的图片失效(无法正常加载),请留言反馈或直接联系我。
安装Apache
[root@VM_83_104_centos /]# yum install httpdLoaded plugins: fastestmirror, langpacks
Loading mirror speeds from cached hostfile
Resolving Dependencies
--> Running transaction check
---> Package httpd.x86_64 0:2.4.6-40.el7.centos.4 will be installed
--> Processing Dependency: httpd-tools = 2.4.6-40.el7.centos.4 for package: httpd-2.4.6-40.el7.centos.4.x86_64
--> Processing Dependency: /etc/mime.types for package: httpd-2.4.6-40.el7.centos.4.x86_64
--> Processing Dependency: libaprutil-1.so.0()(64bit) for package: httpd-2.4.6-40.el7.centos.4.x86_64
--> Processing Dependency: libapr-1.so.0()(64bit) for package: httpd-2.4.6-40.el7.centos.4.x86_64
--> Running transaction check
---> Package apr.x86_64 0:1.4.8-3.el7 will be installed
---> Package apr-util.x86_64 0:1.5.2-6.el7 will be installed
---> Package httpd-tools.x86_64 0:2.4.6-40.el7.centos.4 will be installed
---> Package mailcap.noarch 0:2.1.41-2.el7 will be installed
--> Finished Dependency Resolution
...
...
...
Installed:
httpd.x86_64 0:2.4.6-40.el7.centos.4
Dependency Installed:
apr.x86_64 0:1.4.8-3.el7 apr-util.x86_64 0:1.5.2-6.el7 httpd-tools.x86_64 0:2.4.6-40.el7.centos.4 mailcap.noarch 0:2.1.41-2.el7
Complete!
Centos7 操作Apache2的基本命令
systemctl start httpd.service #启动apache
systemctl stop httpd.service #停止apache
systemctl restart httpd.service #重启apache
systemctl enable httpd.service #设置apache开机启动
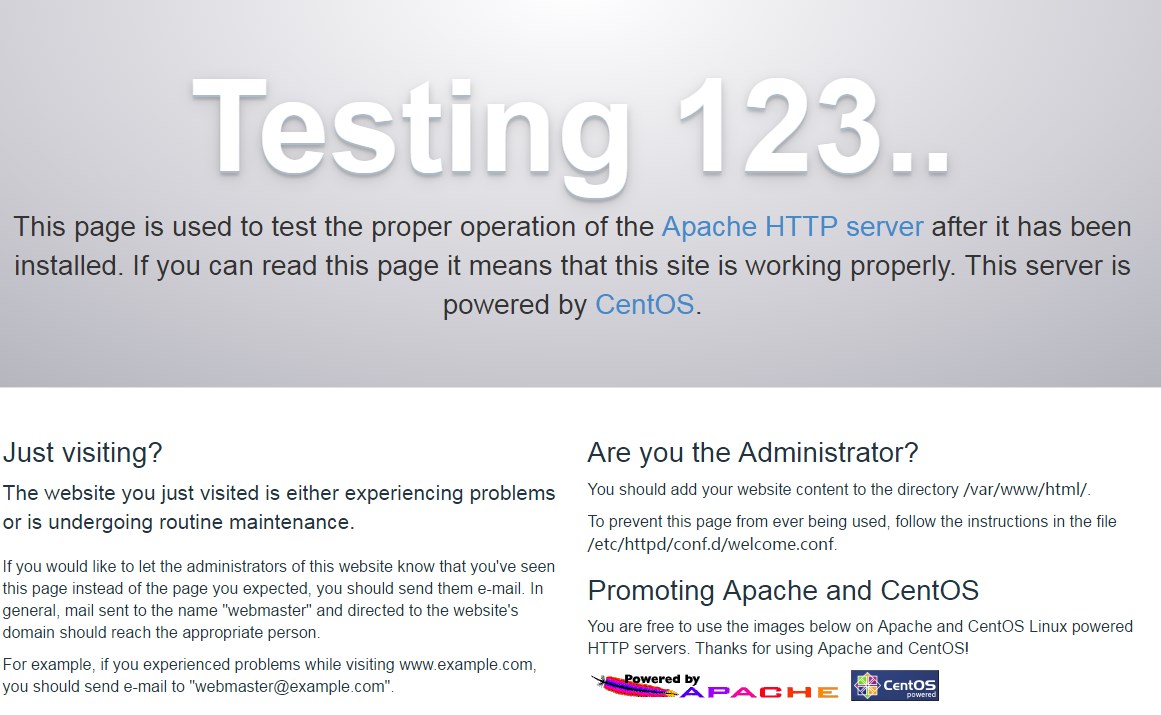
安装完,访问测试出现如下页面则为安装成功!

安装MySQL
Centos7中通过yum方式快速安装mysql并不行!
[root@VM_83_104_centos /]# yum install mysql
Loaded plugins: fastestmirror, langpacks
Loading mirror speeds from cached hostfile
Resolving Dependencies
--> Running transaction check
---> Package mariadb.x86_64 1:5.5.50-1.el7_2 will be installed
--> Processing Dependency: mariadb-libs(x86-64) = 1:5.5.50-1.el7_2 for package: 1:mariadb-5.5.50-1.el7_2.x86_64
--> Running transaction check
---> Package mariadb-libs.x86_64 1:5.5.44-2.el7.centos will be updated
---> Package mariadb-libs.x86_64 1:5.5.50-1.el7_2 will be an update
--> Finished Dependency Resolution
Dependencies Resolved
===============================================================================================================================================================================================
 Package                                        Arch                                     Version                                               Repository                                 Size
===============================================================================================================================================================================================
Installing:
 mariadb                                        x86_64                                   1:5.5.50-1.el7_2                                      updates                                   8.9 M
Updating for dependencies:
 mariadb-libs                                   x86_64                                   1:5.5.50-1.el7_2                                      updates                                   755 k
Transaction Summary
===============================================================================================================================================================================================
Install  1 Package
Upgrade             ( 1 Dependent package)
Total download size: 9.7 M
Is this ok [y/d/N]: y
Downloading packages:
Delta RPMs disabled because /usr/bin/applydeltarpm not installed.
(1/2): mariadb-libs-5.5.50-1.el7_2.x86_64.rpm                                                                                                                           | 755 kB  00:00:00
(2/2): mariadb-5.5.50-1.el7_2.x86_64.rpm                                                                                                                                | 8.9 MB  00:00:00
-----------------------------------------------------------------------------------------------------------------------------------------------------------------------------------------------
Total                                                                                                                                                           34 MB/s | 9.7 MB  00:00:00
Running transaction check
Running transaction test
Transaction test succeeded
Running transaction
  Updating   : 1:mariadb-libs-5.5.50-1.el7_2.x86_64                                                                                                                                        1/3
  Installing : 1:mariadb-5.5.50-1.el7_2.x86_64                                                                                                                                             2/3
  Cleanup    : 1:mariadb-libs-5.5.44-2.el7.centos.x86_64                                                                                                                                   3/3
  Verifying  : 1:mariadb-libs-5.5.50-1.el7_2.x86_64                                                                                                                                        1/3
  Verifying  : 1:mariadb-5.5.50-1.el7_2.x86_64                                                                                                                                             2/3
  Verifying  : 1:mariadb-libs-5.5.44-2.el7.centos.x86_64                                                                                                                                   3/3
Installed:
  mariadb.x86_64 1:5.5.50-1.el7_2
Dependency Updated:
  mariadb-libs.x86_64 1:5.5.50-1.el7_2
Complete!默认安装的是Mysql的分支mariadb。因为mysql被oracle收购后,原作者担心mysql闭源,所以又写了一个mariadb,这个数据库可以理解为mysql的分支。
正确安装方法:
安装rpm包
[root@VM_83_104_centos /]# rpm -Uvh http://dev.mysql.com/get/mysql-community-release-el7-5.noarch.rpm
Retrieving http://dev.mysql.com/get/mysql-community-release-el7-5.noarch.rpm
Preparing...                          ################################# [100%]
Updating / installing...
   1:mysql-community-release-el7-5    ################################# [100%]
查看可用的Mysql安装资源
[root@VM_83_104_centos /]# yum repolist enabled | grep "mysql.*-community.*"
mysql-connectors-community/x86_64    MySQL Connectors Community             24
mysql-tools-community/x86_64         MySQL Tools Community                  38
mysql56-community/x86_64             MySQL 5.6 Community Server            289
安装Mysql社区版
[root@VM_83_104_centos /]# yum -y install mysql-community-server
Loaded plugins: fastestmirror, langpacks
Loading mirror speeds from cached hostfile
Resolving Dependencies
--> Running transaction check
---> Package mysql-community-server.x86_64 0:5.6.34-2.el7 will be installed
--> Processing Dependency: mysql-community-common(x86-64) = 5.6.34-2.el7 for package: mysql-community-server-5.6.34-2.el7.x86_64
--> Processing Dependency: mysql-community-client(x86-64) >= 5.6.10 for package: mysql-community-server-5.6.34-2.el7.x86_64
...
# 安装成功后,将其加入开机启动
systemctl enable mysqld
# 启动mysql服务进程
systemctl start mysqld
# 配置mysql(设置密码等)
mysql_secure_installationNOTE: RUNNING ALL PARTS OF THIS SCRIPT IS RECOMMENDED FOR ALL MySQL
SERVERS IN PRODUCTION USE! PLEASE READ EACH STEP CAREFULLY!
In order to log into MySQL to secure it, we'll need the current
password for the root user. If you've just installed MySQL, and
you haven't set the root password yet, the password will be blank,
so you should just press enter here.
Enter current password for root (enter for none): [输入系统密码]
ERROR 1045 (28000): Access denied for user 'root'@'localhost' (using password: YES)
Enter current password for root (enter for none):
ERROR 1045 (28000): Access denied for user 'root'@'localhost' (using password: YES)
Enter current password for root (enter for none):
OK, successfully used password, moving on...
Setting the root password ensures that nobody can log into the MySQL
root user without the proper authorisation.
Set root password? [Y/n] y [设置mysql新密码]
New password:
Re-enter new password:
Sorry, passwords do not match.
New password:
Re-enter new password:
Password updated successfully!
Reloading privilege tables..
... Success!
By default, a MySQL installation has an anonymous user, allowing anyone
to log into MySQL without having to have a user account created for
them. This is intended only for testing, and to make the installation
go a bit smoother. You should remove them before moving into a
production environment.
Remove anonymous users? [Y/n] y [删除匿名用户]
... Success!
Normally, root should only be allowed to connect from 'localhost'. This
ensures that someone cannot guess at the root password from the network.
Disallow root login remotely? [Y/n] n [禁止root用户远程连接]
... skipping.
By default, MySQL comes with a database named 'test' that anyone can
access. This is also intended only for testing, and should be removed
before moving into a production environment.
Remove test database and access to it? [Y/n] y [删除test测试库]
- Dropping test database...
ERROR 1008 (HY000) at line 1: Can't drop database 'test'; database doesn't exist
... Failed! Not critical, keep moving...
- Removing privileges on test database...
... Success!
Reloading the privilege tables will ensure that all changes made so far
will take effect immediately.
Reload privilege tables now? [Y/n] y [刷新权限]
... Success!
All done! If you've completed all of the above steps, your MySQL
installation should now be secure.
Thanks for using MySQL!
Cleaning up...参考资料:
http://blog.itpub.net/29773961/viewspace-1261417/
http://blog.itpub.net/29773961/viewspace-1248176/
http://www.tuicool.com/articles/rUrAv2
正文到此结束
- 本文标签: Linux MySQL
- 本文链接: https://www.zhyd.me/article/32
- 版权声明: 本文由张亚东原创发布,转载请遵循《署名-非商业性使用-相同方式共享 4.0 国际 (CC BY-NC-SA 4.0)》许可协议授权
热门推荐
相关文章
该篇文章的评论功能已被站长关闭


